
How to install
If you have a spare iPhone or iPad or iPod touch, don’t keep it in your desk but use it as a seismometer with iShindo application.
Here we show how to install your device (iPhone/iPad/iPod touch) in your home.
Wi-Fi network in your home is preferable so that you can check how your home is safe after a shake anywhere you go out.
Here we show how to install your device (iPhone/iPad/iPod touch) in your home.
Wi-Fi network in your home is preferable so that you can check how your home is safe after a shake anywhere you go out.

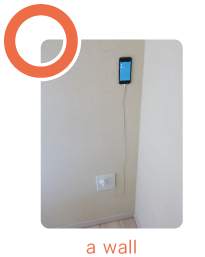
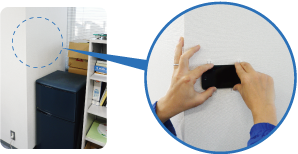
To measure an earthquake precisely, put your device firmly on a wall of a room or on a pillar of your house.
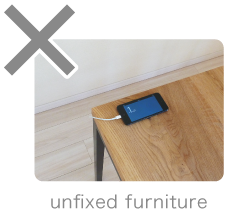
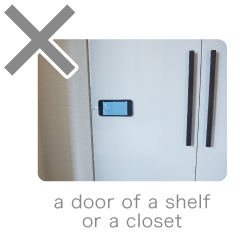
Build-in furniture is acceptable for installation and you can avoid setting on a door of it.

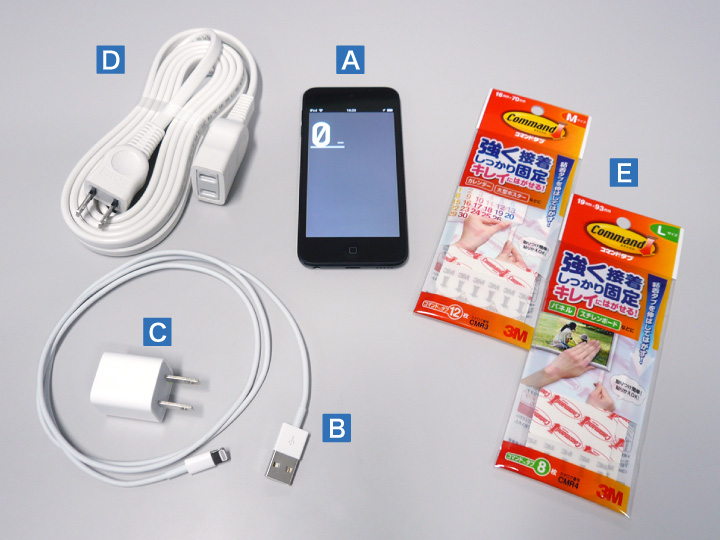
![[A]](/yure/images/eA.png) a spare iPhone※1
a spare iPhone※1![[B]](/yure/images/eB.png) USB cable
USB cable![[C]](/yure/images/eC.png) Power supply adaptor
Power supply adaptor![[D]](/yure/images/eD.png) Extension code
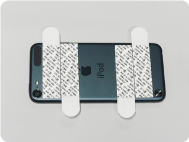
Extension code![[E]](/yure/images/eE.png) Adhesive material (double-face tape)※2)
Adhesive material (double-face tape)※2)
- ※1 Set Wi-Fi ON.
- ※2 We recommend the double-face tape that can be removed without any marks on the object (e.g. “3M Command Refill Strips”).
[Product Info] ⇒ Command Refill Strips

Put double-faced tape
on the reverse side of the device.
Press the device to put on a wall
or on the surface of fixed furniture
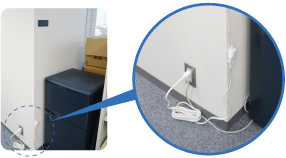
Connect the USB cable and the power
supply adaptor to the device.
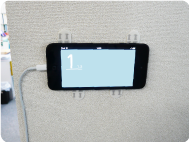
Tap the iShindo icon on your device
display to start the application.
![]()
